Employee Sign In Portal
The EmployeeUser accounts for drivers, dispatchers, and other staff to perform varying functions in TrackIt. Sign In portal allows non-drivers to clock inGoing on or off the clock for the purpose of tracking total hours worked. and out of work properly without using an in-cab device. Additionally, drivers may use this portal to view their ScheduleA tool for scheduling daily employee shifts. Employers may use this to set start and end times for each employee. and Driver Goals. In some circumstances, drivers may also be given the ability to clock in and out and enter statuses if they are required to record their time for meetings or trainings that do not include driving.
Using the Portal
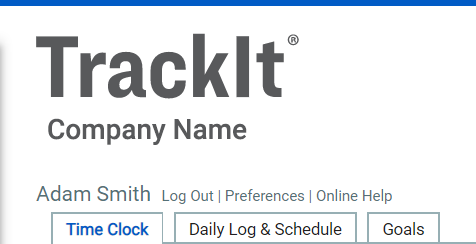
The Employee Sign In portal can be accessed through the TrackIt Web Console sign in page. The link to the sign in is located below the Sign In button for the TrackIt Web Console. Upon logging in, users will see two or three tabs, these tabs are: Time Clock, Daily Log & Schedule, and Goals. Additional links are provided next to the user's name.
- Navigate to https://system.trakitgps.com/employeeLogin/EmpLogin.jsp. OR
- Navigate to the TrackIt Web Console login page and click Employee Sign In.
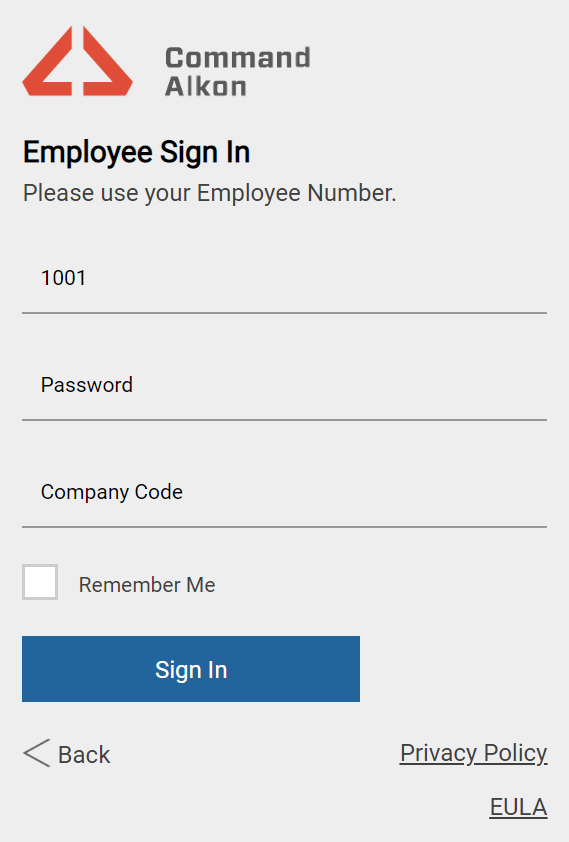
- Enter in your Employee Number and Password. The Company Code should automatically populate.
- Click the Sign In button.
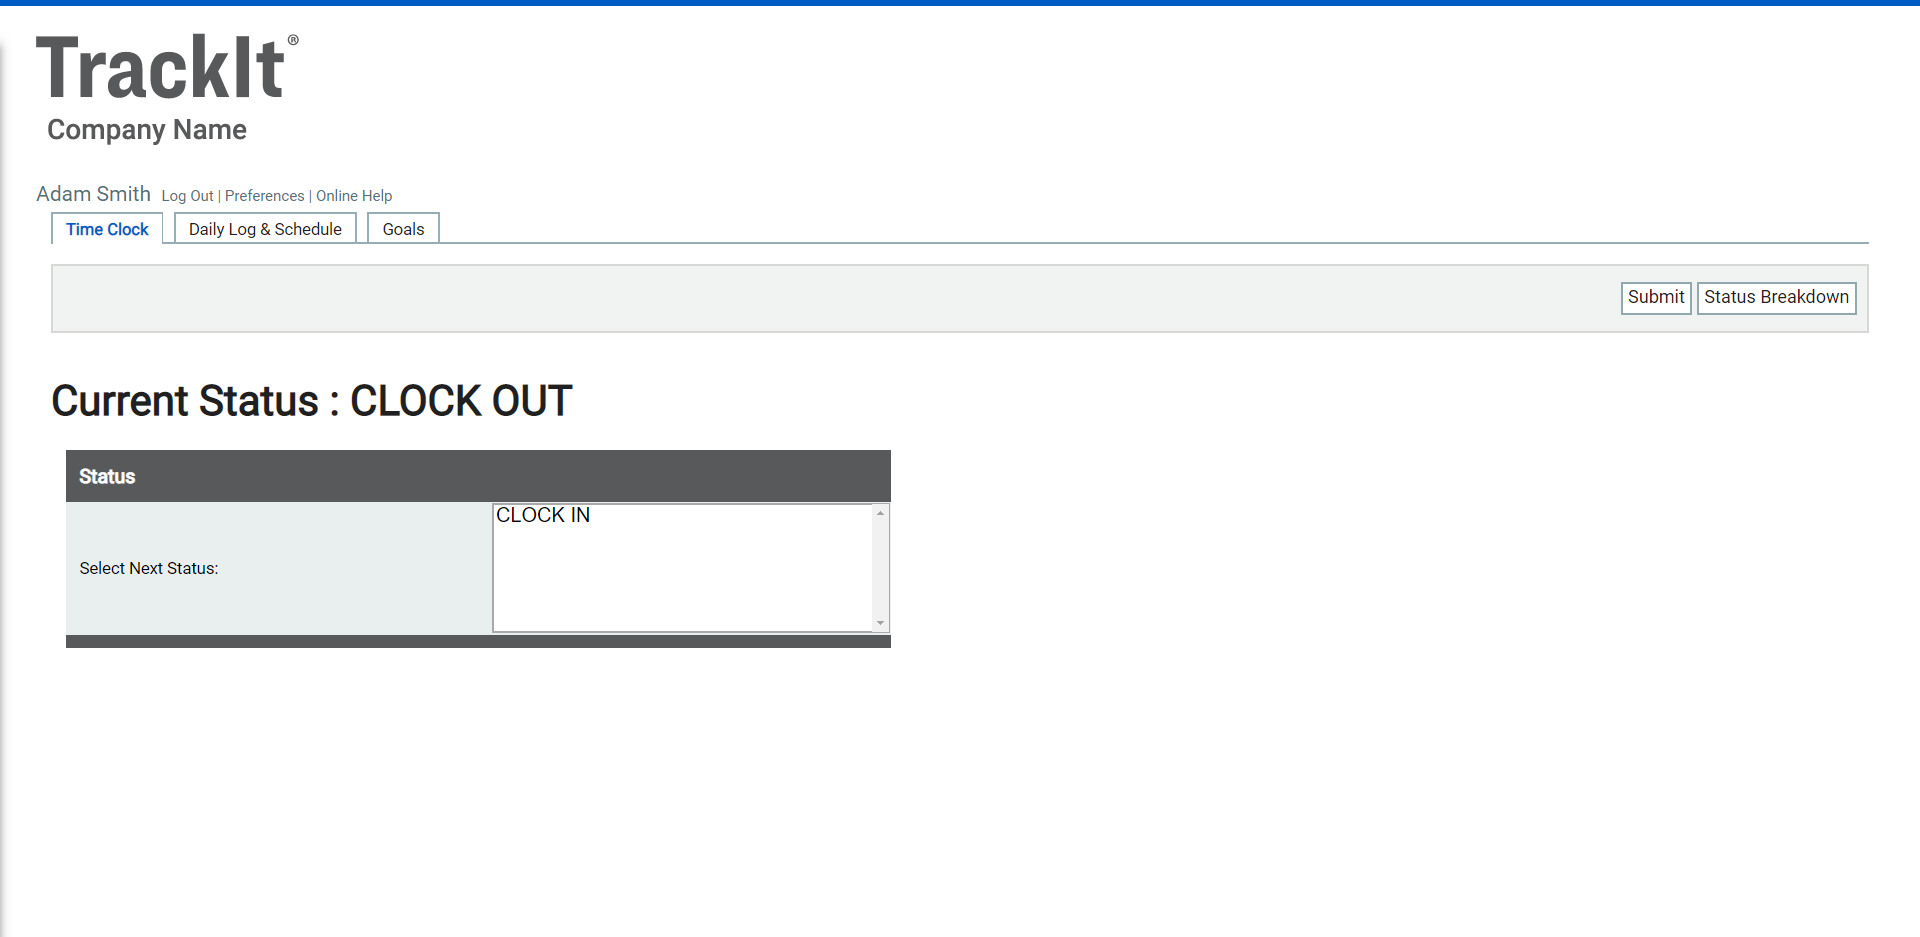
Time Clock
This tab is displayed when a user signs in. The interface here allows users to enter into a statusThe specific activity or task a driver is currently engaged in, typically as part of a process called a "status loop." through the portal. Typically, the statuses available will be the Clock In and Clock OutGoing on or off the clock for the purpose of tracking total hours worked. statuses. Additional statuses may be added, like Yard Work or Training to indicate the user's activities while clocked in through the portal.
The user's current status will be displayed above the other available statuses. A status history breakdown is available from this tab as well.
- Make sure you are have selected the Time Clock tab.
- Under your current status, select your next desired status from the list.
- Click Submit
 to enter your chosen status.
 - Tap Status Breakdown
 to view your status history.


Users will only see this tab if the Web Login license and a non-driver status type have been associated with their employee type. Otherwise, users may see the following.
Portal with no Time Clock tab
This occurs when drivers use the Employee Sign In with neither the Web Login license nor the non-driver status type associated with their employee type.
Portal with a Time Clock tab and no status
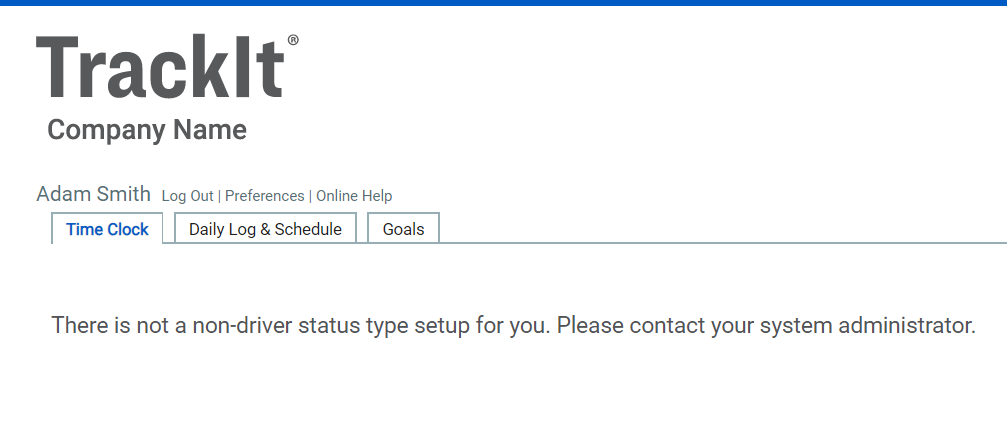
Employees will see this error when they log in with a Web Login license but with no non-driver status type associated with their employee type.
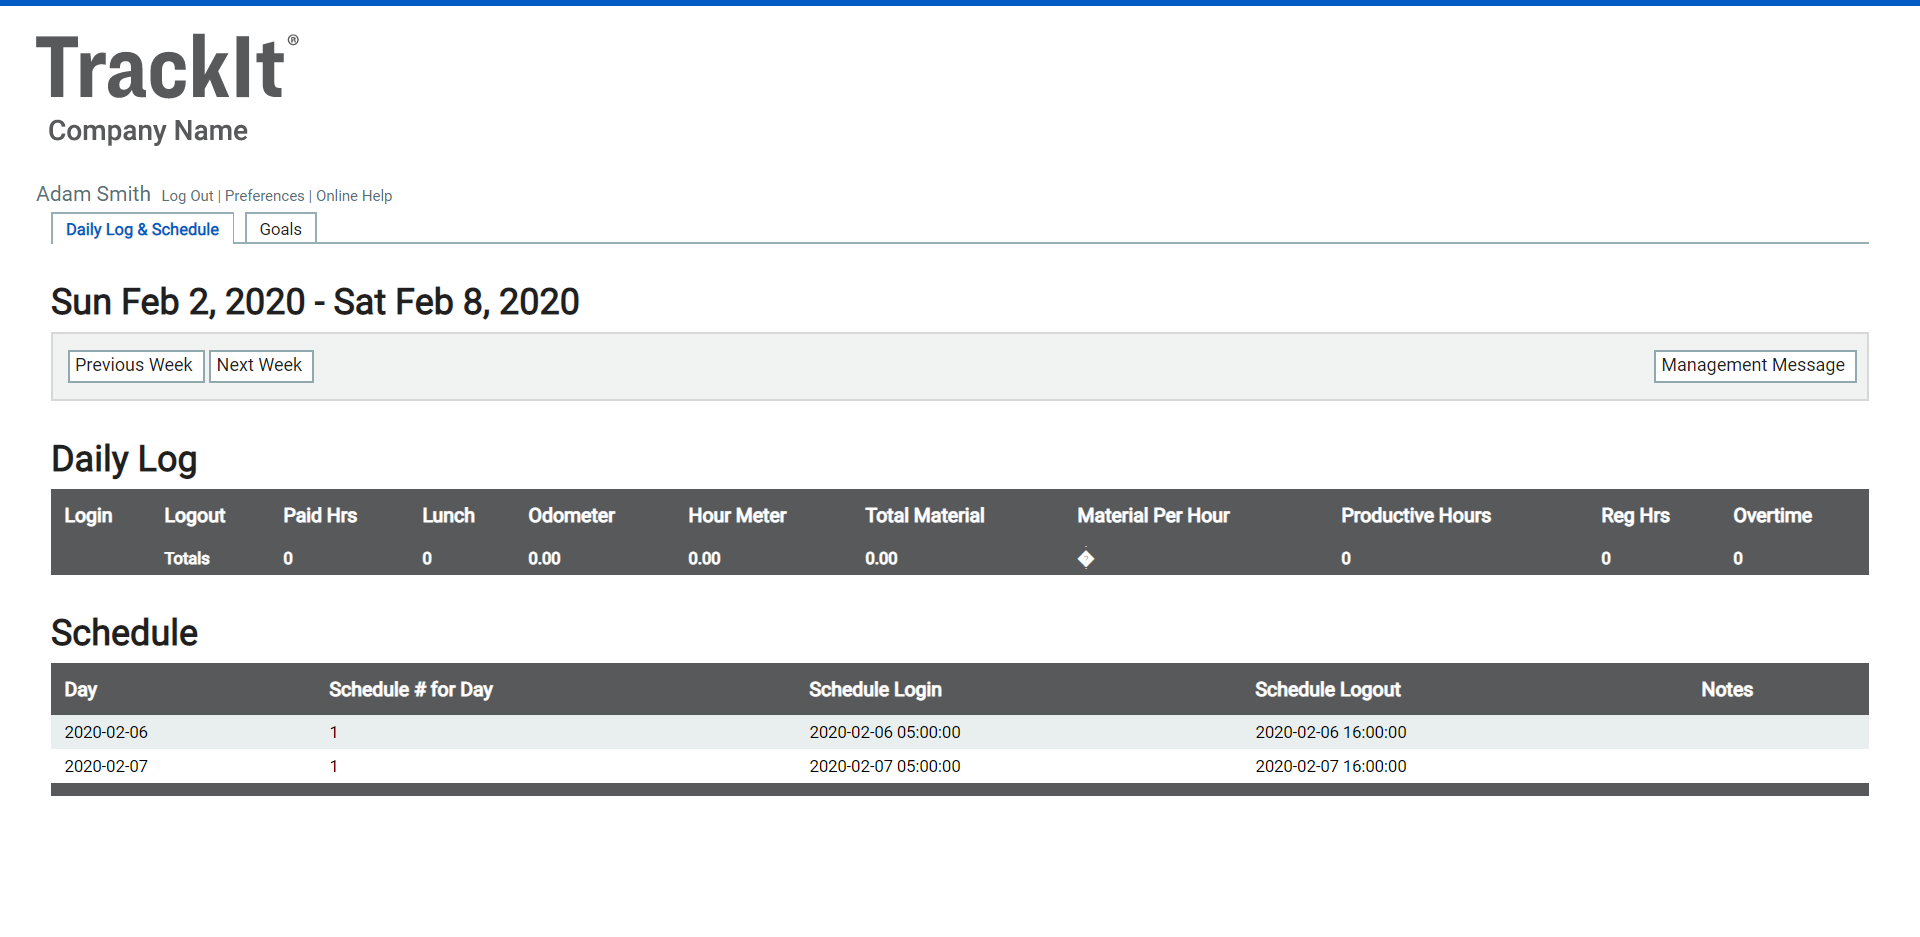
Daily Log & Schedule
Employees can view the daily log from their current week of work and their weekly schedule. Their daily log includes a breakdown of their hours and what was achieved within those hours. Employees can view Management MessagesText messages exchanged between drivers and dispatchers using TrackIt. past or future logs and schedules by using the Previous Week and Next Week buttons.

|
Login/Logout |
Lists the login and log out dates and times. |
|---|---|
|
Paid Hrs |
Presents a count of the paid hours the user worked on the specified date. |
|
Lunch |
Hours used for lunch. |
| Odometer | Miles or kilometers driven by the employee. |
| Hour Meter | Number of hours recorded while in a vehicleAll machines used as a means of production on a construction site or at a batch plant.. |
| Total Material | Displays measurement of cubic yards or meters of material hauled on the date. |
| Material Per Hour | Amount of material hauled divided by the number of hours worked. |
| Productive Hours | Time calculated in which the driver was being productive. |
| Reg Hrs | Hours worked without overtime. |
| Overtime | Number of overtime hours worked. |
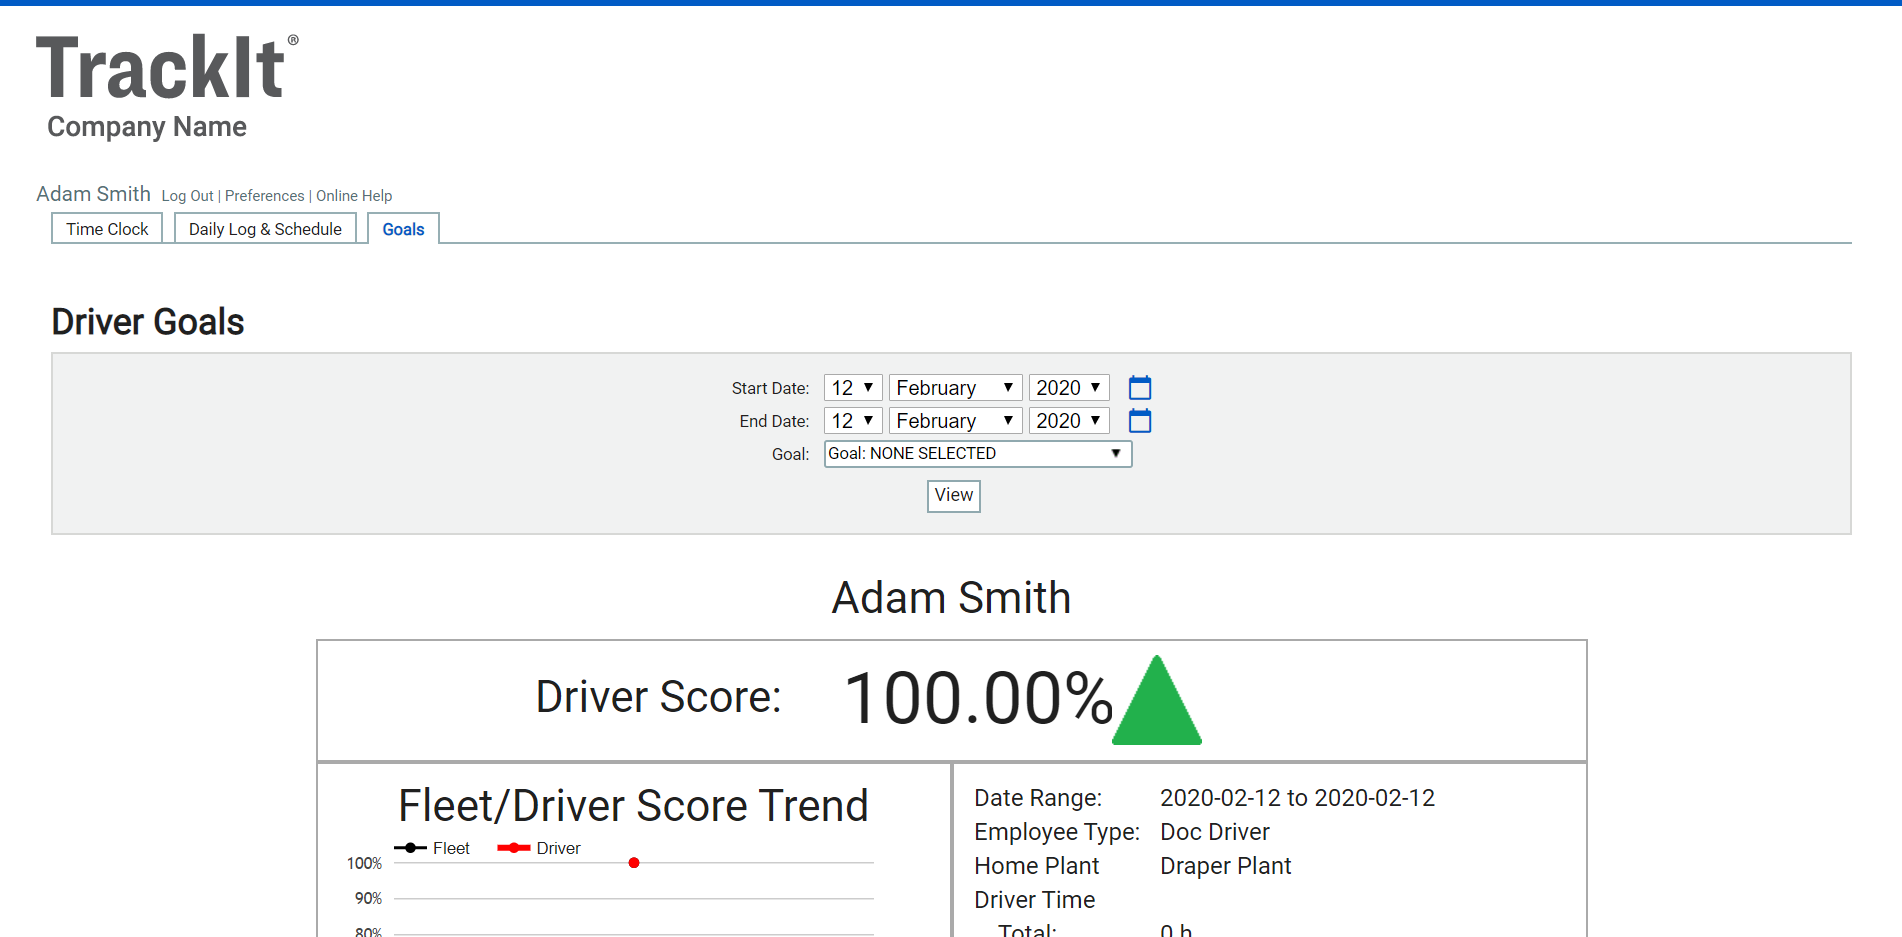
Goals
Drivers have the option to view their goals from the Goals tab. They can filterA search tool that restricts data queried based on factors like equipment type, employee groups, and date ranges. by date and by goal(s). The table displays the Driver Score, Score Trend, InfractionViolations of driver goals. Infractions can include excessive hard braking or acceleratiion, idling, and late logins. Impact, and other statistics regarding their driving record. This information is also available to administrators in the Driver Performance reports.
Additional Links
Users may use the links next to their names to log out, change preferences, and access the online help.
Setting up the Employee Sign In portal
Administrators must both license the WebLogin feature and create and assign a non-driver status type for the user to have access to statusing within the Employee Sign In portal. In some situations, administrators may also need to reset the employee's password.
- Navigate to Employee > Employee.
- From the drop-down menu, select the employee type with the non-driver status applied.
- Click the Edit
 button for the desired employee.
 - Select the Licenses tab.
- Check
 the Non Driver License option. New license options will appear.
 - Check the WebLogin license.
- Click Save
 .
.


The instructions below assume that no non-driver status type has been created or assigned within the TrackIt Web Console either for non-driver employees or for drivers.

- Navigate to Settings > Status > Status and click the blue
 button next to the type drop-down list.


The Add Status Type dialog windowA pop-up window that requires user input. appears.

- Enter a Description. This label typically mirrors the associated Equipment Type for ease of assignment.
- Select Enforce Status Restrictions if you wish to ensure drivers follow a logical path of actions on the TrackIt Android app. A Status Restriction must exist for this functionality to work.
- Click Save .
Add your desired non-driver statuses using the process below.
- Navigate to Settings > Status > Status.
- Click the Add New Status
 button to create a new status.
 - From the Data tab, provide values for the Name, Number, First or Last Status, and To create a status type fields.
- Click on the Cards tab to include Status Card on the Android app while in this status.
- Select the desired card from the drop-down menu and click Add to Status
 .
. - If you've chosen multiple cards, click the arrow

 buttons to reorder how they'll appear on the tablet screen.
 - Click Save .


After adding your desired statuses, add status restrictions to the statuses.
- Navigate to Settings > Status > Status Restriction.
- From the drop-down menu, select the To create a status type containing the statuses needing restrictions.
- Select the Edit button next to the status you would like to add a restriction to.
- From the dialog screen, select a status from the Status Type in the drop-down menu.
- Click the Add to Status button to add the status as the next status in the status loopA series of statuses that constitute the typical process a driver should progress through as part of their daily duties..
- Check the box next to the status to give drivers the option to manually change to the status.
- Repeat steps 4 and 5 to add additional status options to the usual status progression.
- Reorder the statuses by selecting a status and using the up or down buttons.
- Click the Save button to add the restrictions to the status.
After creating the non-driver status type, apply it to the Employee Type.
- Navigate to Settings > Employee > Employee Type.
- Click the Edit button for the employee type you wish to give access to the portal.
- In the Non-Driver Status Type drop-down menu, select your newly created status type.
- Select Save .
From the Employee Sign In portal (employee access only)
- Select the Preferences link next to your name.
- In the dialog window, enter your old and new password into the portal.
- Click Save .
From the TrackIt Web Console (administrator access only)
- Navigate to Settings > Employee > Employee.
- Click Edit next to the employee requiring the change.
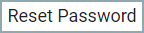
- In the dialog window, select Reset Password
 . This will reset the employee's password to their employee number.
|
|
|
|