From the equipment mapA map view that tracks the locations and statuses of individual equipment in a fleet. The dispatcher's equivalent to a "bird's-eye view.", dispatchers can complete many of their jobA project that orders and tickets are grouped under. tasks, such as monitoring driver progress, messagingText messages exchanged between drivers and dispatchers using TrackIt. drivers, managing hotspots, and managing tickets. Each of these tasks can be accomplished directly from the Equipment Map and do not necessarily rely on any prerequisites. We recommend using this guide as a quick reference for each of the various tasks or processes you wish to perform from the equipmentAll machines used as a means of production on a construction site or at a batch plant. map.
- Use the Dispatch Summary panel
- Get directions
- Find a location
- Get location details from the map
- Use Find Near
- Create a hotspot
- Edit a destination hotspot
- Update a status from the map
- Send a message from the map
Use the Dispatch Summary panel
This panel is the default panel that will appear on the right side of the map. From this panel, you can see the statusThe specific activity or task a driver is currently engaged in, typically as part of a process called a "status loop." of each item of equipment, the alertA software-generated message or warning triggered by vehicle data. types for the current equipment, and the messagesText messages exchanged between drivers and dispatchers using TrackIt. to and from each piece of equipment.
- Navigate to Dispatch > Equipment Map.
- In the Dispatch Summary panel, use the instructions below to adjust the panel for different uses.
- To set filters for vehicles, click the Filters
 button in the top-left corner of the panel.
 - To refresh vehicle states, click the Refresh
 button in the top-left corner of the panel.
 - To view vehicle information, click the Expand

 button next to a vehicleAll machines used as a means of production on a construction site or at a batch plant. entry.
 - To reduce vehicle information, click the Collapse

 button.
 - To acknowledge an alert, click the Acknowledge Alert
 button.
 - To open the equipment pop-up window, click on the Equip., Time, and Status description.

- To filter unacknowledged alerts and messages, click on the desired icon type. The full alert messageText messages exchanged between drivers and dispatchers using TrackIt. will display next to the icon indicating the type of alert.
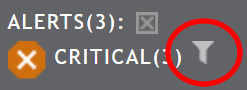
- To filter by alert type, click on the alert type you wish to see for all logged-in vehiclesAll machines used as a means of production on a construction site or at a batch plant.. Any equipment without the selected type is removed from the list. A filterA search tool that restricts data queried based on factors like equipment type, employee groups, and date ranges. icon will appear next to it to indicate that a filter is set.
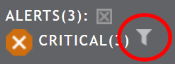
- To disable the filter, click on the alert icon once more.
- Selecting an alert to filter against will only affect which vehicles are shown in the Dispatch Summary dialog window. This will not hide other alert types for the equipment shown.


Get directions
This feature on the equipment map allows you to quickly map a path for equipment using an Address, Hotspot, or Coordinates.
- Click the Directions link in the Panels tab.
- In the Directions panel, enter in a Start location using an Address, Hotspot, or Coordinates.
- Enter in an End location using an Address, Hotspot, or Coordinates.
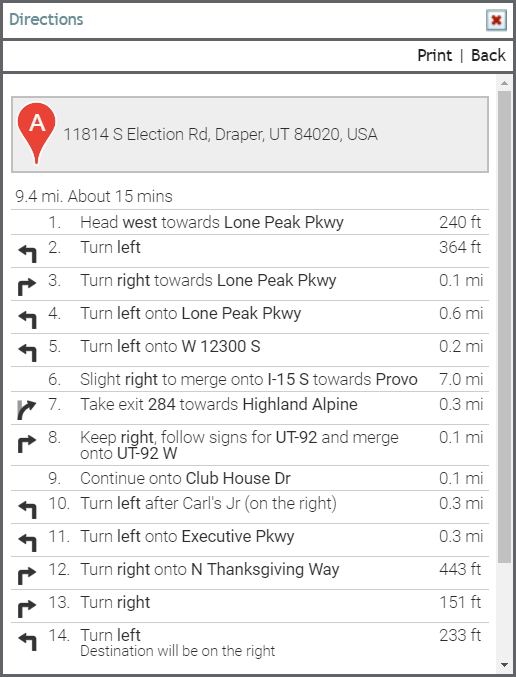
- Click the Directions
 button. This not only highlights a route on the map view, but also displays step-by-step directions.

Find a location
With this feature, you are able to pinpoint a location on the map by entering in an address, hotspotGeographic areas marked on a map that act as destinations for driver navigation or triggers for automated behaviors in TrackIt., equipment number, or coordinates. If your company covers a large area or has lots of equipment, this can assist with simplifying the search for one item on a map.
- Click the Find link in the Panels tab.
- In the Find dialog windowA pop-up window that requires user input. on the map, select what you would like to search for.
- If Address, enter in the most exact address.
- If Hotspot, select a hotspot from the drop-down menu.
- If Equipment, select the equipment number from the drop-down menu.
- If Coordinates, enter in the latitude and longitude.
- Click the Find
 button to find the location. A red location marker
  appears at the desired location or equipment.


Get location details from the map
Frequently, job sites exist in places where no official addresses have been assigned or a piece of equipment might need directions from a specific point on the map. Using location details, you can right-click on the map and find the coordinates and address for the location you click.
- Navigate to Dispatch > Equipment Map.
- Right-click over the location on the map for which you want details.
- Select the LOCATION DETAILS
 button at the bottom of the pop-up pane. The Location Details pane will appear to the left with the location's latitude and longitude.
 - Click Get Address
 to generate the street address for your location.


Use Find Near
The Find Near dialog window allows you to identify equipment types within a geographic location. This can help simplify the view for dispatch when a few different types of equipment are present at a job site.
- Click the Find Near link in the Panels tab.
- In the Find Near dialog window, select the Type of equipment.
- Select a Distance to limit the search radius.
- In the Near field, enter in an Address, a Hotspot, Equipment, or Coordinates.
- If Address, enter in the most exact address.
- If Hotspot, select a hotspot from the drop-down menu.
- If Equipment, select the equipment number from the drop-down menu.
- If Coordinates, enter in the latitude and longitude.
- Click the Find button to show the equipment fitting your criteria. Additionally, a red location marker will pinpoint the address or coordinates you searched for.
Create a hotspot
Hotspot maintenance from the map allows you to see each hotspot in relation to other locations and to create a hotspot without leaving the map.
- Navigate to Dispatch > Equipment Map.
- Right-click on the desired section of the map and click CREATE A HOTSPOT
 .
. - Left-click on an area of the map to designate as the center of the hotspot. The boundaries of the geofenceGeographic areas marked on a map that act as destinations for driver navigation or triggers for automated behaviors in TrackIt. can be changed at a later point, so this is not a permanent action.
- Provide a Description, Shape, Type, and Size.
- Click Save
 .
.


To change a hotspot to a polygon shape
- Click on the icon indicating the center of the hotspot, and then click EDIT
 .
. - Select the Shape drop-down menu and pick Polygon.
- Click Save .
- Click on the hotspot's center icon again and this time select ADJUST SHAPE
 .
. - Click and drag the points at each corner to adjust the shape of the geofence. Click along the blue lines to add more points to manipulate.
- Once you're done adjusting the hotspot, click Save .


Edit a destination hotspot
You have the option to edit the hotspot that automatically generates from the address on a ticketShort for “delivery ticket,” which is printed and given to the driver. Also called a tag or docket. The ticket includes, at a minimum, the product(s) ordered and the delivery address. It can also include the amounts of materials batched to form the mix. In the past, producers sent copies of the delivery ticket with prices as invoices; now tickets and invoices are two separate documents.. If an address on a ticket is invalid or isn't exact enough, this feature can help you prevent status flow errors from a misplaced hotspot.
- Navigate to Dispatch > Equipment Map.
- Click the equipment icon for the vehicle you wish to send a message or the status of the vehicle in the Dispatch Summary screen.
- Select the TICKET #
 button.
 - In the Ticket # dialog window, select the Edit Destination Hotspots
 button.
 - From the Edit Destination Hotspots dialog window, choose the current hotspot by selecting it from the Assigned column.
- Click the left arrow
 button to remove the selected hotspot.
 - Choose the desired hotspot from the Unassigned column and move it to the Assigned column with the right arrow
 button.


- Click Save to return to the Ticket # dialog window.
Update a status from the map
A driver may forget to change statuses or you may be required to move drivers into statuses to ensure they follow the proper status flow.
- Navigate to Dispatch > Equipment Map.
- Click the equipment icon for the vehicle you wish to send a message or the status of the vehicle in the Dispatch Summary screen.
- Select the UPDATE STATUS
 button from the pop-up dialog screen.

 button to show more drop-down menus with equipment selection options. Select the Hide
 button to add any selected equipment to the status change and to show the previous dialog screen layout.
- From the Status drop-down menu, choose which status you would like to update the status to.
- Check Sent to Interface if you want to send the status change to an interfacing system.
- Click Save to finish updating the status.
Send a message from the map
Without leaving the map and losing track of other equipment, you can send individual or group messages through the map. These are text messages, canned messages, or questions.
- Click the equipment icon for the vehicle you wish to send a message or the status of the vehicle in the Dispatch Summary screen.
- Select the SEND MESSAGE
 button.
 -
If you want to choose different pieces of equipment to receive your message, select the Modify
 button to show more drop-down menus with equipment selection options. Select the Hide
  button to add any selected equipment to the message and to show the previous dialog screen layout.
 - Select the Message Type from the drop-down menu.
- If you choose Text, enter your unique message in the Message field below.
- If you choose Canned, select the pre-written message from the drop-down menu that appears below.
- If you choose Question, select the type of question using the radio buttons
 underneath your Message field. Depending on which type of question you choose, the message and response will change.
- When done, click the Send
 button to send the message.


|
|
|
|