Dispatch > Dispatch View > Employee Dispatch
All drivers logged in on the TrackIt Android app with equipmentAll machines used as a means of production on a construction site or at a batch plant. associated will display here. The function of this screen is to provide dispatchers with employeeUser accounts for drivers, dispatchers, and other staff to perform varying functions in TrackIt.-specific information as they complete a status loopA series of statuses that constitute the typical process a driver should progress through as part of their daily duties., such as current statusThe specific activity or task a driver is currently engaged in, typically as part of a process called a "status loop.", time spent in the status, and outstanding alerts. In the grid  view, statuses in the loop display as individual columns that show how long an employee spent in that status and how far they are into the status loop. In the list
  view, employee names appear simply with alerts, current status, and time spent in that status.
|
|
|

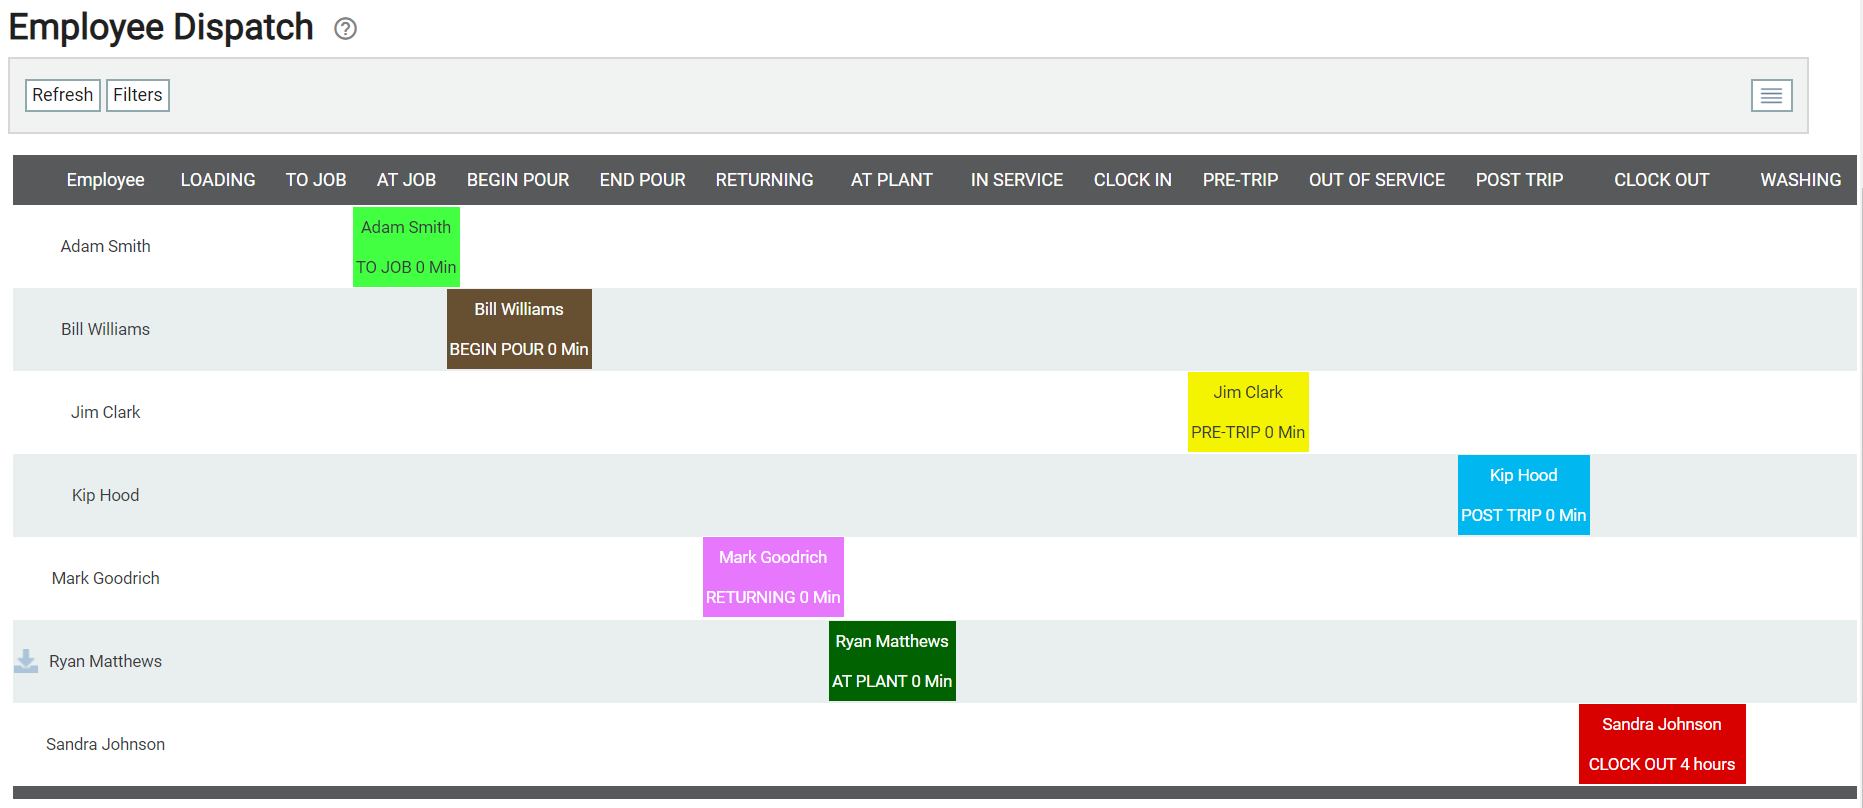
With this information, you can better monitor when employees spend more or less time than they should on a status, such as taking long breaks at lunch or washing the truckAll machines used as a means of production on a construction site or at a batch plant. too quickly at the end of a shift.
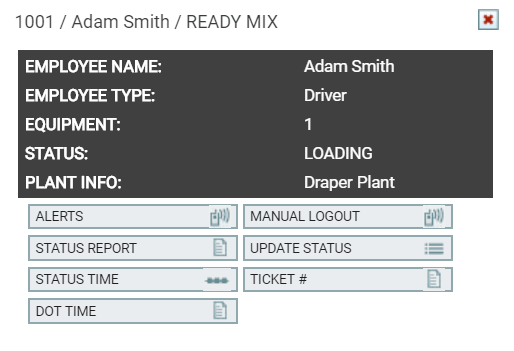
Rollover dialog screen and buttons
|
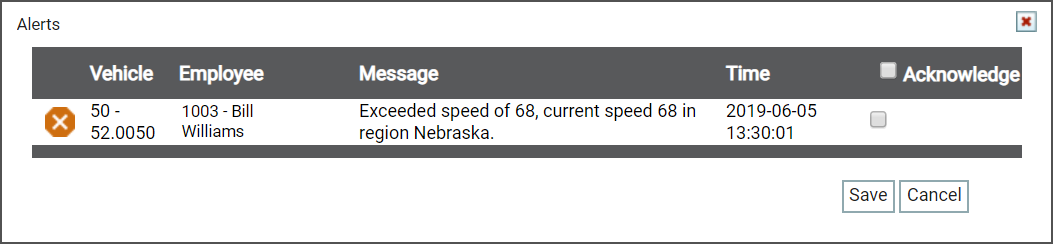
Provides a list of all the alerts a driver has been sent and the details of the alertA software-generated message or warning triggered by vehicle data.. Acknowledge an alert by selecting
|
|||||||
|
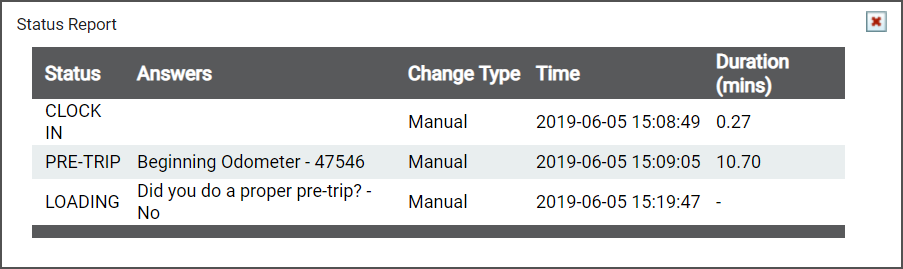
Status Report |
Shows a rundown of the driver's statuses and the time spent in each status.
|
||||||
|
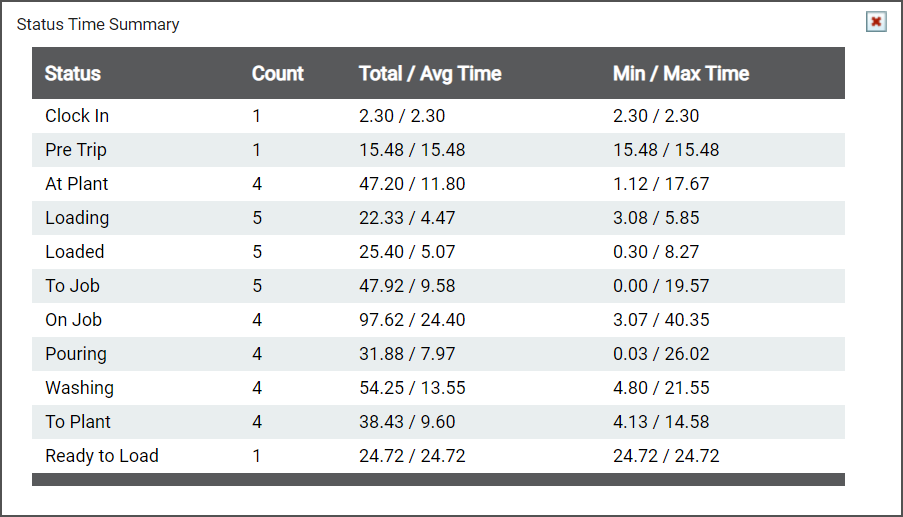
Status Time |
Includes how many times a driver has entered a status, the combined time they were in a particular status, and the average and maximum time they were in the status. It contains the following columns: Status, Count, Total/Avg Time, and Min/Max Time.
|
||||||
|
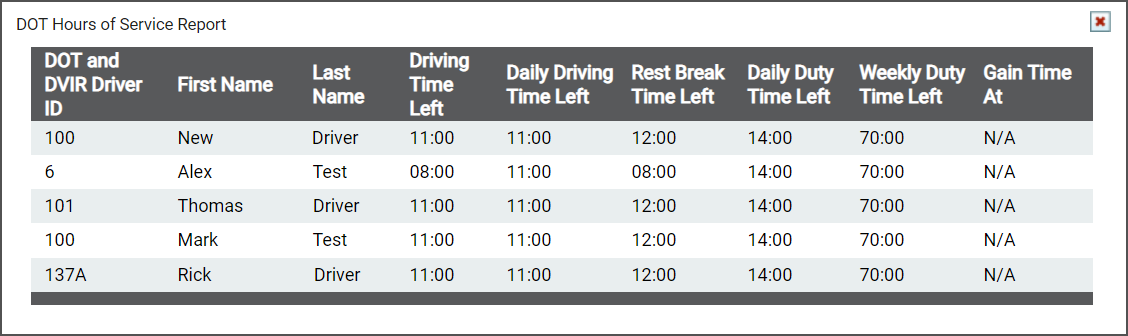
DOT Time |
Displays a screen with a report of each drivers' DOT time reporting.
|
||||||
|
Manual Logout/Login |
These options can be used when you need to manually log out a driver and to manually log in a driver. |
||||||
|
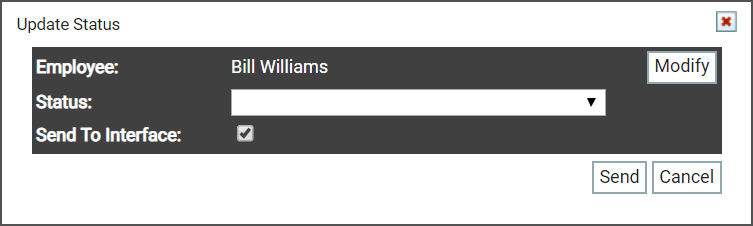
Update Status |
Provides a dialog screen with options for updating an employee's status. This is used by dispatchers to manually change a status,as opposed to drivers manually changing their own status.
|
||||||
|
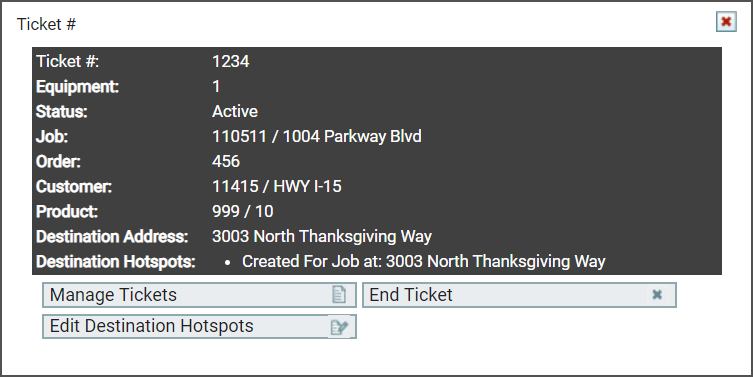
Ticket # |
Displays a dialog screen with details about the driver's current ticketShort for “delivery ticket,” which is printed and given to the driver. Also called a tag or docket. The ticket includes, at a minimum, the product(s) ordered and the delivery address. It can also include the amounts of materials batched to form the mix. In the past, producers sent copies of the delivery ticket with prices as invoices; now tickets and invoices are two separate documents. and options for managing and ending tickets and editing destinationThe location of a job or pour site that a driver must navigate to. hotspots.
|


- Navigate to Dispatch > Dispatch View > Employee Dispatch.
- If using the grid
 view, select either the employee's name on the left or the status name in their status block. If using the list
  view, select the employee's status on the right. A dialog screen with rollover buttons will appear.
 - Select the MANUAL LOGOUT
 button.
 - From the dialog window that appears, click the Logout
 button.


- Navigate to Dispatch > Dispatch View > Employee Dispatch.
- If using the grid view, select either the employee's name on the left or the status name in their status block. If using the list view, select the employee's status on the right. A dialog screen with rollover buttons will appear.
- Select the MANUAL LOGIN
 button.
 - From the dialog window that appears, select the appropriate information from the Phone, Equipment, and Employee drop-down menus.
- Click the Login
 button to finish logging in the employee.


- Navigate to Dispatch > Dispatch View > Employee Dispatch.
-
If using the grid
view, select either the employee's name on the left or the status name in their status block. If using the list view, select the employee's status on the right. A dialog screen with rollover buttons will appear. - Select the UPDATE STATUS
 button.
 - From the Update Status dialog window, select the desired status from the Status drop-down menu.
- Select the Send To Interface
 check box to allow the status change to sync with any integrated dispatch system you might use.
 - Click the Send
 button to complete the status change.


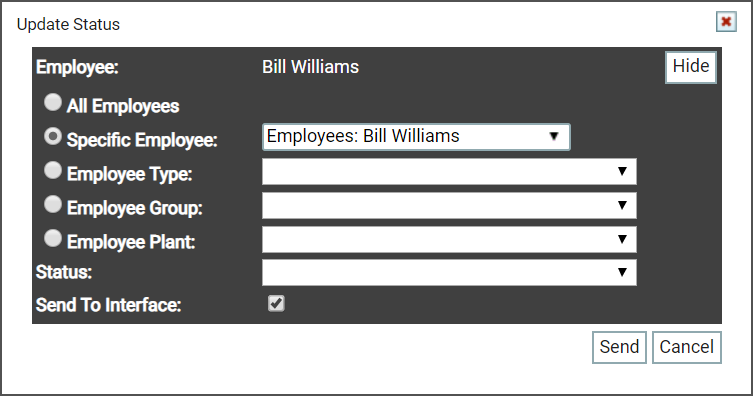
If you want to alter which employees' status changes:
- Click the Modify
 button to the right of the employee's name. The dialog screen will offer different options.
 - From the drop-down menu options, select the employee(s) whose status(es) you would like to change.
- Either complete the steps below to complete the status change or click Hide
 to return to the previous dialog screen with your changes.
 - Select the Send To Interface check box to allow the status change to sync with any integrated dispatch system you might use.
- Click the Send button to complete the status change.

