Settings > Hotspots & Regions > Region
Regions are a more large-scale form of hotspots that TrackIt uses to keep track of time, distance, and fuel usage in a geographic area. These geofences are used to group all equipmentAll machines used as a means of production on a construction site or at a batch plant. activity by state, city, and even county based on the needs of a company.
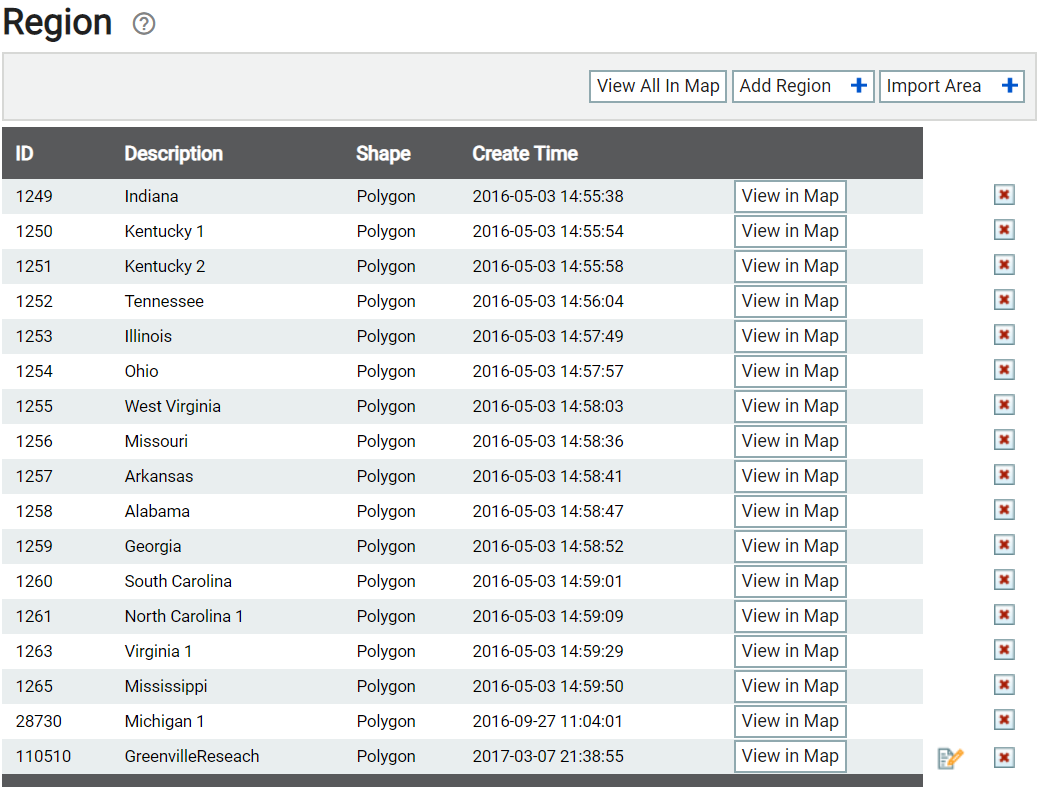
Adding a region
Companies sometimes use this functionality to track where equipment spends most of their time, which can assist in company decisions like where to build a new plantA production plant or material storage location..
|
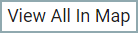
View All in Map |
Displays all regions visually on the Equipment Map. We recommend using this method as it allows you to manually add regions and manipulate region borders according to your unique geographical boundaries.
|
|
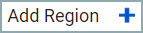
Add Region | Launches the Add Region dialog windowA pop-up window that requires user input.. |
|
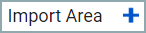
Import Area | Adds a regionLarge-scale hotspots used to track fleet activity, such as at the state/province/city level. to your map in the shape of the selected state or province based on the associated country. These geofences may be altered manually as needed from the Equipment Map screen. |
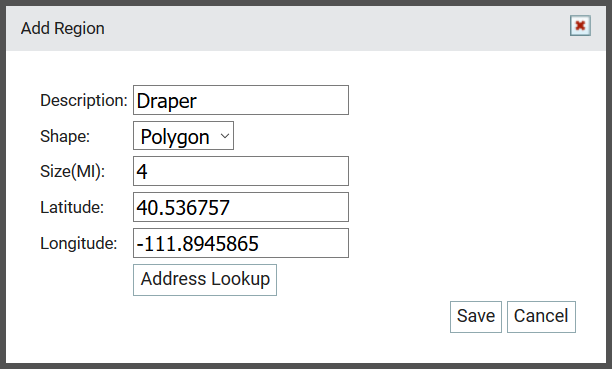
Add Region dialog window
|
The label to identify the region. |
|
|
The design of the region can take two shapes: Circle and Polygon. Circles center on coordinates specified when generating the geofenceGeographic areas marked on a map that act as destinations for driver navigation or triggers for automated behaviors in TrackIt., whereas polygons may be drawn in any shape the administrator wants on the Equipment Map for better accuracy. |
|
|
The size of the hotspotGeographic areas marked on a map that act as destinations for driver navigation or triggers for automated behaviors in TrackIt. across its circumference, either in miles or kilometers. |
|
|
The GPS coordinates for the center of the hotspot, as specified by latitude and longitude. |
- Navigate to Settings > Hotspots & Regions > Region.
- Click the View All in Map
 button. The Equipment Map screen loads.
 - Right-click on the desired section of the map and click CREATE A REGION
 .
. - Left-click on an area of the map to designate as the center of the region. The boundaries of the region can be changed at a later point, so this is not a permanent action.
- Provide a Description, Shape, and Size.
- Click Save
 . By default, this creates a circular region.


To make a polygon shape
- Click on the icon indicating the center of the region (
 ) and then click EDIT
  .
. - Select the Shape drop-down menu and pick Polygon.
- Click Save .
- Click on the region's center icon again and this time select ADJUST SHAPE
 .
. - Click and drag the points at each corner to adjust the shape of the region. Click along the blue lines to add more points to manipulate.
- Once you're done adjusting the region, click Save .


Importing an area
If you wish to use a predefined region, you may click the Import Area button to generate an area in the shape of the selected state and at the GPS coordinates for the center of that state.
- Navigate to Settings > Hotspots & Regions > Region.
- Click the Import Area
 button to launch the Import Area dialogue screen.
 - Select your Country and Area from the drop-down menus.
- Select Save to finish importing the area.