| Overview |
|
Requirements |
|
Installing display |
|
Installing probe |
|
Installing flowmeter |
|
Installing OBC/EDC |
|
Connecting cables |
|
FAQ |
|---|---|---|---|---|---|---|---|---|---|---|---|---|---|---|

|
|
|
|
|
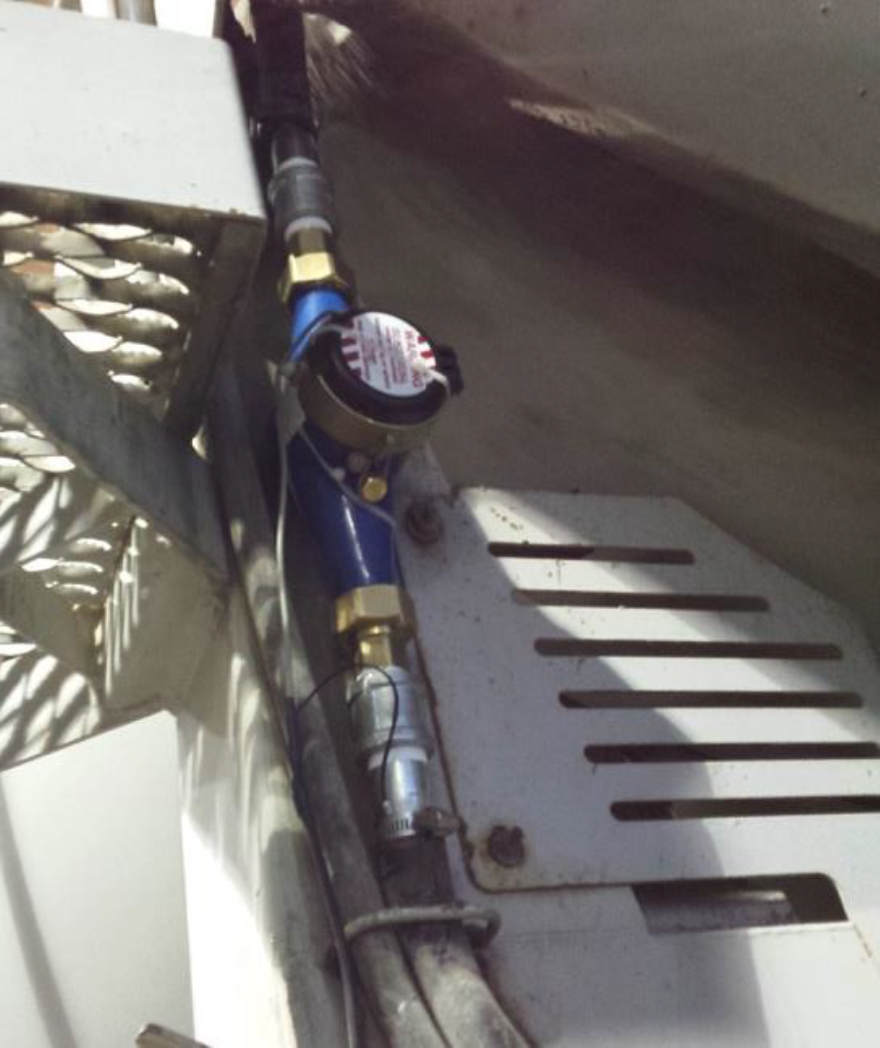
The flowmeter is an optional component that allows for accurate measurements of water added to a loadThe total amount of concrete or asphalt that is being or has been batched for delivery.. TrackIt uses these water flow readings to gauge water added and trigger alerts when these contributions exceed allowable amounts.
The mechanical installation of the flowmeter is simple. Basic hand tools and tubing adapters are required for the installation.
Select the installation location
Prepare and measure fittings
Cut the water pipe accordingly
Secure the flowmeter
Connect the flowmeter to the receiver
Check if the display is on
When water is flowing:
Check if the counter on the flowmeter is increasing
Check if the water is increasing on the receiver display
Inform CAI of the completed installation
- Cut the water line as close as possible to the chute and insert the flowmeter in the line. If the hose size is different than the flowmeter’s, adapters will be required.
- Insert the end of the thermistor attached on the cable between the hose and the flowmeter and secure it using pipe clamps.
- Secure the flowmeter using the provided custom bracket and tie-wraps.
|
|
|