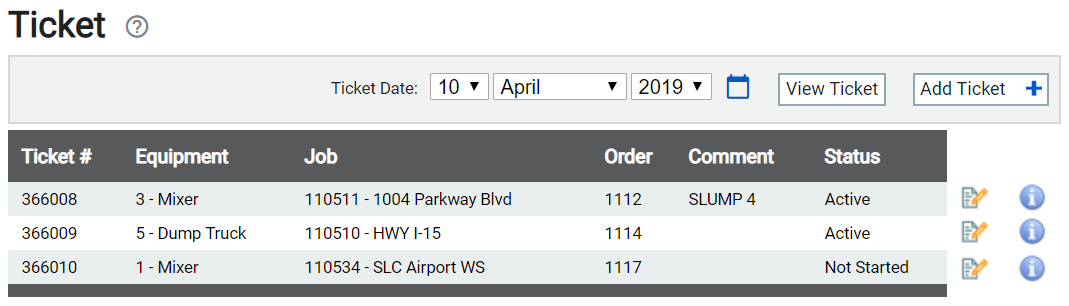
Dispatch > Ticket Management > Ticket
Tickets contain the details a dispatcher driver needs to know when preparing to leave a Plant with materials. The information critical toward completing a client orderIndividual requests for specific materials that are associated with a job. Some jobs may consist of multiple orders of varying products. includes the destinationThe location of a job or pour site that a driver must navigate to. address, assigned vehicleAll machines used as a means of production on a construction site or at a batch plant., client contact data, and the purchased quantity of Product(s).
From a driver's perspective on the TrackIt Android app, they will see the ticketShort for “delivery ticket,” which is printed and given to the driver. Also called a tag or docket. The ticket includes, at a minimum, the product(s) ordered and the delivery address. It can also include the amounts of materials batched to form the mix. In the past, producers sent copies of the delivery ticket with prices as invoices; now tickets and invoices are two separate documents. fields you select from the Home Screen Display Fields and/or Load Screen Display Fields tables on the Site Settings screen.
- Navigate to Dispatch > Ticket Management > Ticket.
- Using the drop-down menus or calendar, select the date on which the ticket was created.
- Click the View Ticket
 button.
 - From the list of tickets created on a specific date, find the one you want to alter.
- Click Edit
 to change the ticket details or continue on to assigning the ticket.

Creating a ticket
Tickets may be manually created outside of an integrated ticketing solution. However, we recommend continuing to utilize your current system for automatic importing of ticketing details to TrackIt.
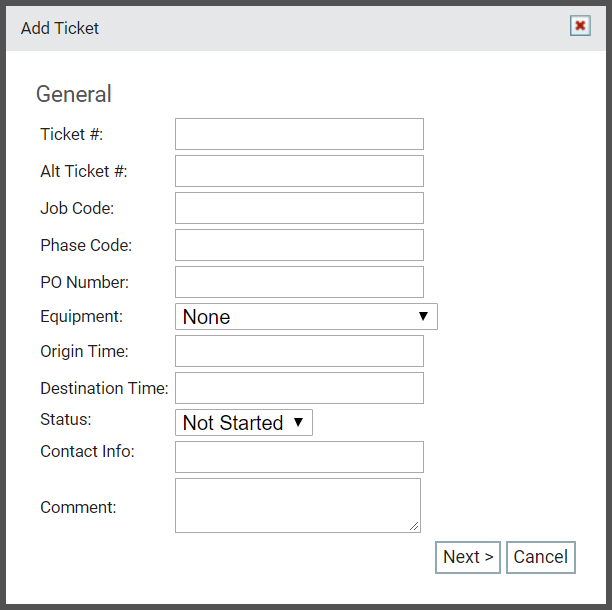
Add Ticket dialog window
|
The number assigned by your integrated ticketing service is provided here. This is used to look up specific jobA project that orders and tickets are grouped under. details from reports such as Daily Breakdown, Ticket Summary, and Ticket Time Summary. |
|||||
|
Some integrated solutions may use multiple values for ticketing, so this field acts as an additional method of data tracking. |
|||||
|
The number associated with the project or job. This is also referred to as the Job Number, as shown from the Job screen. |
|||||
|
The code associated with a project that may span multiple phases of completion. This is often automatically generated via an integrated ticketing solution. |
|||||
|
The purchasing order (PO) number associated with the ticket. This is often automatically generated via an integrated ticketing solution. |
|||||
|
For effective tracking of tickets completed, a vehicle should be assigned to each ticket. This may be done from the Ticket Assignment screen, if not here. |
|||||
|
Primarily used for aggregateRock. Granular ingredients in concrete such as sand, gravel, crushed stone. work, this time is how long a truckAll machines used as a means of production on a construction site or at a batch plant. has to arrive at a loading site after leaving their truck yard. We recommend using the associated status action to automatically record the actual origin time upon changing a status.
|
|||||
|
The time of the vehicle arriving at its destination location should be entered here. This helps in identifying when a vehicle arrived at a job site. We recommend using the associated status action to automatically record the actual destination time upon changing a status.
|
|||||
|
The state of a ticket that affects how it is treated by TrackIt and whether a driver is actively completing the associated loadThe total amount of concrete or asphalt that is being or has been batched for delivery.. The following statuses are available for each ticket:
|
|||||
|
Each ticket often needs a phone number to reach the customer overseeing or purchasing the services rendered. Though the field isn't required, we recommend including a number for the dispatcher to call if problems arise. |
|||||
|
Additional information regarding a ticket, such as location clarifications and contact names, may be specified here. |
Customer dialog window
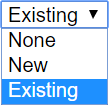
| New or Existing Customer |
From this drop-down menu you, you can create a ticket without customer information, enter the information manually, or select pre-existing information. You may edit the existing customer information after you choose this option. Add new customers on the Customer page.
|
|---|---|
|
If you are creating a ticket as part of a job ordered by an existing customer, the external ID is automatically generated by the system. If you are creating a ticket for a new customer, you may enter a new ID into the field. We recommend creating an ID that copies the automatically generated ID by connecting the Customer Code and the Customer Name with a hyphen.
|
|
|
A field for the customer's unique numerical code. |
|
|
If you chose to select an existing customer, this option provides a drop-down menu where you may select which customer's information you want to include on the ticket. |
|
|
The names for customer contacts. |
|
|
Phone numbers associated with each contact name. |
|
|
Can include more specific details about the ticket, such as location, contact information, and instructions. |
Job dialog window
| New or Existing Job | From this drop-down menu, you can select New to enter in new job information. Selecting Existing will auto-populate the dialogue screen and give you the option to choose an existing job from the Job # and Descr drop-down menus. |
|---|---|
|
A field for entering a new job number or selecting a job number from an existing job. You can create a new Job from the Job page. |
|
|
Here you may enter in a description for a new job or select an existing job from a drop-down menu. Selecting an existing job description will populate the Job # field with the associated number. |
|
|
This field provides a place to include job-specific details. |
Order dialog window
|
A field for entering a new order number. Or, if you have selected Existing from the drop-down menu on the top right, select an order from the drop-down menu that appears here. Orders can be added on the Order page. |
|
|
Additional details about the order can be entered here. |
Origin dialog window
|
Allows you to select which plantA production plant or material storage location. the vehicle with the ticket should originate from. |
Destination dialog window
|
The street address of the destination here. Since a hotspotGeographic areas marked on a map that act as destinations for driver navigation or triggers for automated behaviors in TrackIt. is generated from the address, it needs to be complete enough to generate a longitude and latitude. |
|
|
If the address extends to a second line, use this field. |
|
|
The destination city. Entering this will help the Address Lookup find the coordinates of the location. |
|
|
The destination state. |
|
|
Entering a zip code can help the Address Lookup function. |
|
|
A drop-down menu with countries provided for the address. |
|
|
|
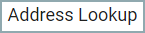
Selecting this option after entering the above address fields will find the latitude and longitude of the ticket destination from the address and populate the below fields. |
|
These fields will auto-populate if the address is entered in above and the Address Lookup |
|
|
This radius is calculated in yards. Using this can help estimation of job locations in case actual pouring sites are slightly removed from the central destination address. |
Return dialog window
|
The plant the vehicle with the ticket should return to. |
Product dialog window
|
The product required for the particular ticket. These products can be added on the Product page. |
|
|
The amount of product needed in the load. |
|
|
|
Pressing this button will add the product and amount to the ticket. You may use this multiple times to enter in multiple products. |

View Ticket Window
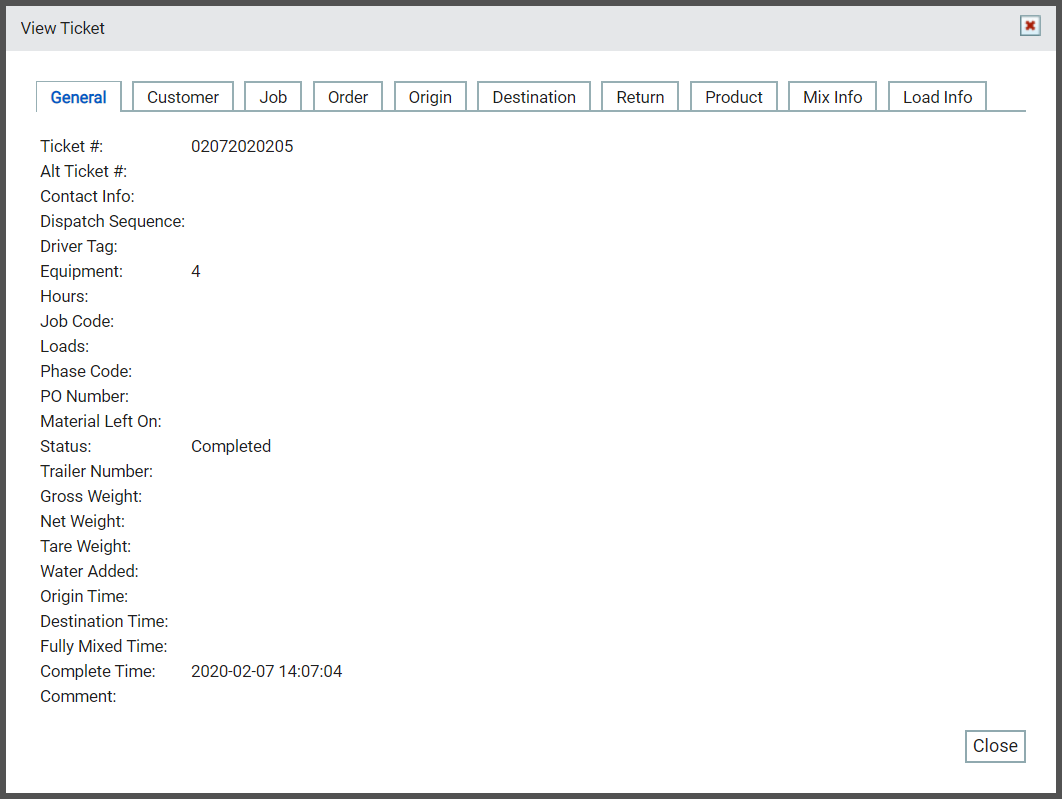
The Info icon  next to the ticket information will display more specific ticket information when clicked. The information entered when the ticket was added or edited will be displayed in this window in category-specific tabs. If a customer has integrated with COMMANDassurance, Mix Info and Load Info are included in addition to other expected ticket information.
- Navigate to Dispatch > Ticket Management > Ticket.
- Select the Add Ticket
 button on the right.
 - Enter the relevant information in the General dialog screen.

 the ticket.
- Select Next
 to proceed to the following dialog screens.
 - Enter in the desired information on each of the following dialog screens. You have the option to leave the dialog screens empty as you go and Edit the ticket later.
- When you reach the dialog screen labeled Finish, click Save
 to enter the ticket.

