Settings > Site User
Administrators, dispatchers, schedulers, and other employees that regularly use the TrackIt Web Console are set up as site users. The entries created here are granted access to specific screens based on their Permission Type. Additional restrictions may be applied based on Employee Type, Equipment Type, and Plant.
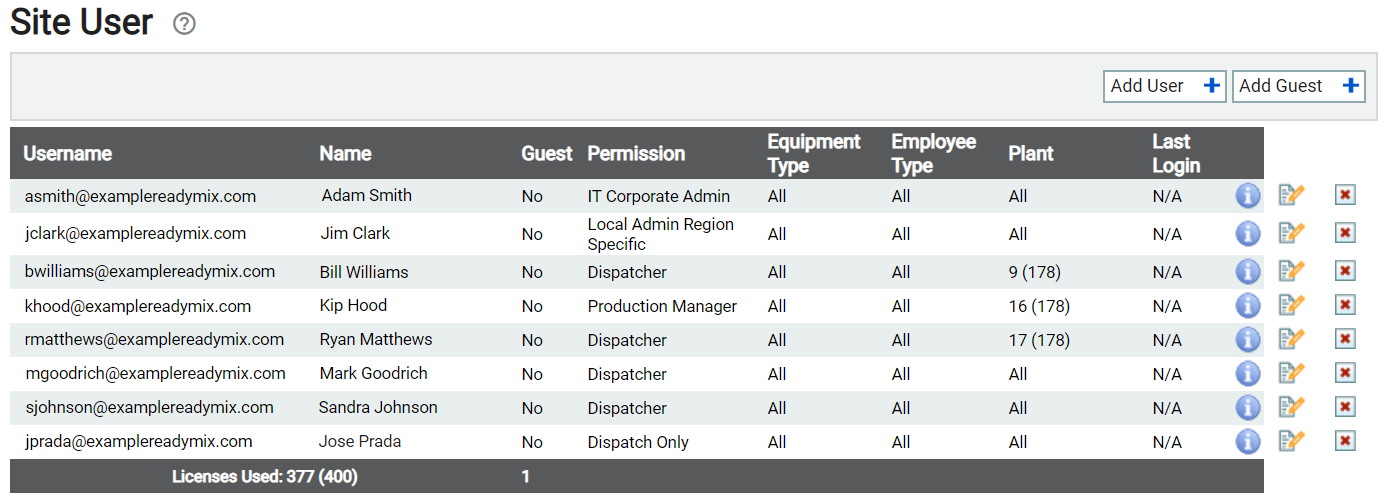
Companies may only have as many site users as purchased Site User Licenses. Additional functionality may be granted to each user based on the types of licenses purchased, such as TrackIt Talk (Zello Dispatch License).
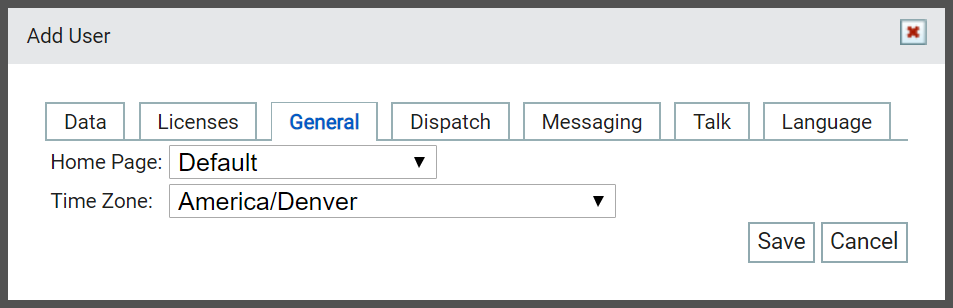
Add User dialog window
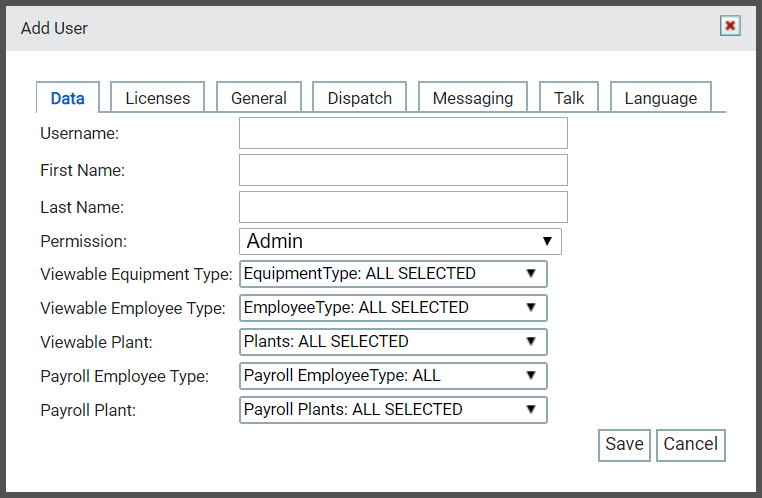
The tabs for the Add User dialog windowA pop-up window that requires user input. allow you to add a new user and configure different aspects of the TrackIt Web Console to suit the new user's jobA project that orders and tickets are grouped under. requirements. Aside from the Data and Licensing tab, the tab options can later be altered by the user in their Preferences.
The Data tab is where you include the user's login and personal information, permission type, payroll details, and specify aspects of the TrackIt Web Console that will be visible to the user.
|
Username |
The email address for the user you are adding. |
|---|---|
|
First Name |
First name of the user. |
|
Last Name |
Last name of the user. |
|
Permission |
A drop-down menu selection of available permission types you can assign to the user.
PREREQUISITE: You must first add permission types to make them available in this drop-down menu.
|
|
Viewable Equipment Type |
Selection of equipment types you can make visible to the user. |
|
Viewable Employee Type |
Selection of employee types you can make visible to the user. |
| Viewable Plant | List of plants you can make visible to the user. |
| Payroll Employee Type | Drop-down list of employeeUser accounts for drivers, dispatchers, and other staff to perform varying functions in TrackIt. types set up for payroll purposes. These can be configured on the Employee Type Setup page. |
| Payroll Plant | A list from which to choose the plant the employee will be associated with for payroll purposes. |
|
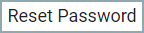
When you edit ( ) a site user's information, the Data tab provides you with the option to reset the user's password. Selecting this button will send an email to the user with instructions for resetting their password. ) a site user's information, the Data tab provides you with the option to reset the user's password. Selecting this button will send an email to the user with instructions for resetting their password. |
If your company has certain licenses, this tab will be available. Here, you have the option to check the available licenses to give the user access to specific features associated with the license.
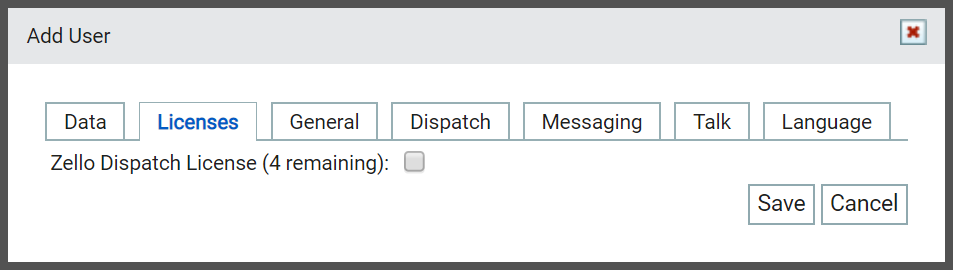
- Check the box
 to enable the license for the user.

Under the General tab, you have the ability to specify the user's home page and time zone.
|
Home Page |
Each time the user logs into the TrackIt Web Console, the first page they will be directed to is their "Home Page." With Default, you establish that the user will always arrive at the main screen of TrackIt. The following options are available: |
|---|---|
| Time Zone |
The time zone for a user affects components of TrackIt they might see, such as timestamps for alerts, reports, and job tickets. |
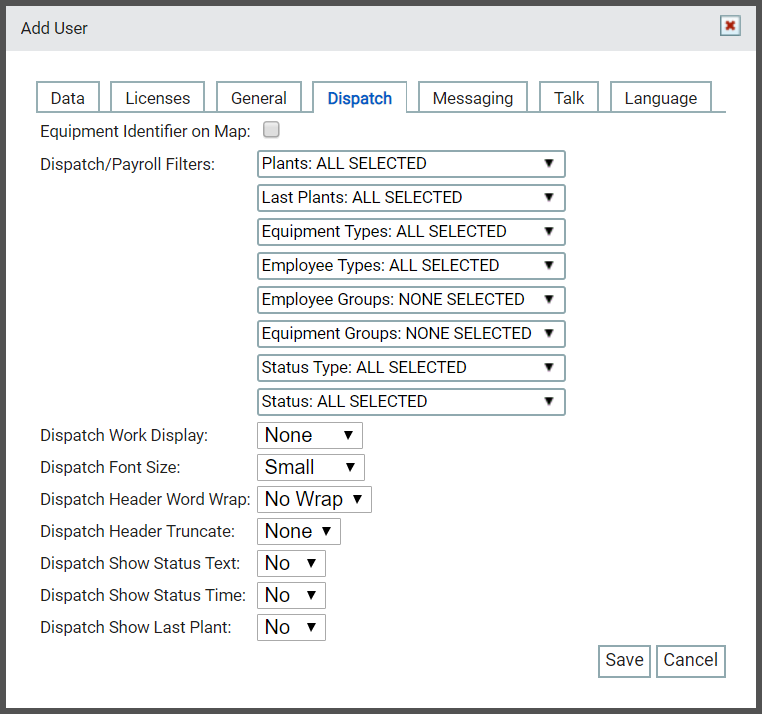
You may configure this tab for dispatchers, so they have access to dispatch-specific places in the TrackIt Web Console. These settings simply change information provided on dispatch screens, such as equipmentAll machines used as a means of production on a construction site or at a batch plant. numbers next to a vehicleAll machines used as a means of production on a construction site or at a batch plant. icon, excluding the statusThe specific activity or task a driver is currently engaged in, typically as part of a process called a "status loop." name for an employee, or showing the last plantA production plant or material storage location. used.
|
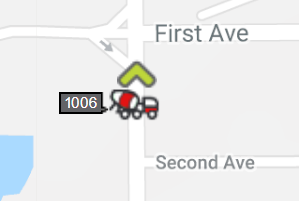
Equipment Identifier on Map |
When viewing the Equipment Map, each individual vehicle in your fleet is displayed on the map without any identifying factors. Enabling this setting will allow the user to view the equipment number next to the vehicle's icon.
Many dispatchers find this feature especially helpful to quickly spot desired vehiclesAll machines used as a means of production on a construction site or at a batch plant. on the screen rather than having to hover the cursor over each vehicle icon. |
|---|---|
|
Dispatch/Payroll Filters |
TrackIt typically remembers the last-used search filters for a report and saves the chosen filterA search tool that restricts data queried based on factors like equipment type, employee groups, and date ranges. setup across all users. If you want to give your user the option to monitor different groups without having to manually change the filters each time, this setting offers a solution. When accessing the Equipment Map, Employee Dispatch, Equipment Dispatch, and Payroll screens, the filters set here are always applied automatically. Select from the following options: |
| Dispatch Work Display |
One difficulty of fleet management is knowing which vehicles are in use for an active ticketShort for “delivery ticket,” which is printed and given to the driver. Also called a tag or docket. The ticket includes, at a minimum, the product(s) ordered and the delivery address. It can also include the amounts of materials batched to form the mix. In the past, producers sent copies of the delivery ticket with prices as invoices; now tickets and invoices are two separate documents.. Set the option here to specify which type of work information the user should see displayed next to the vehicle's information from the Equipment Map, Employee Dispatch, and Equipment Dispatch screens. Select from the following options: |
|
Dispatch Font Size |
The font size for headers on the dispatch screens change with this setting. Select from the following options:
|
|
Dispatch Header Word Wrap |
For screens with limited resolutions, long headers often extend off the screen. The word wrap feature automatically resizes a heading that is too long for one line. Long headers will automatically extend to a second line when this option is set to Wrap. By default, this is set to No Wrap. We recommend also using the Dispatch Header Truncate setting below to shorten headers. |
|
To avoid lengthy headers that extend off the screen on low-resolution devices, truncating offers a simple solution. Set this to the total number of characters (up to a total of 20) you wish to display on the user's screen. Any characters beyond this limit are then truncated with an ellipsis. |
|
|
Dispatch Show Status Text |
When viewing the Employee Dispatch or Equipment Dispatch screens in grid If set to No, only the employee or equipment number, status color, and status time will display for the user. |
|
Dispatch Show Status Time |
The status time on the Employee Dispatch or Equipment Dispatch screens indicates how long an employee has been in that status. The duration for a status may be excluded by setting this option to No. |
|
Dispatch Show Last Plant |
Companies with multiple plants find value in identifying the originThe source or "home" location equipment departs from when en route to a destination. This is typically a plant or yard. of a vehicle's route. Setting this to Yes adds a new column to the dispatch screens which shows the last plant the vehicle loaded at. |

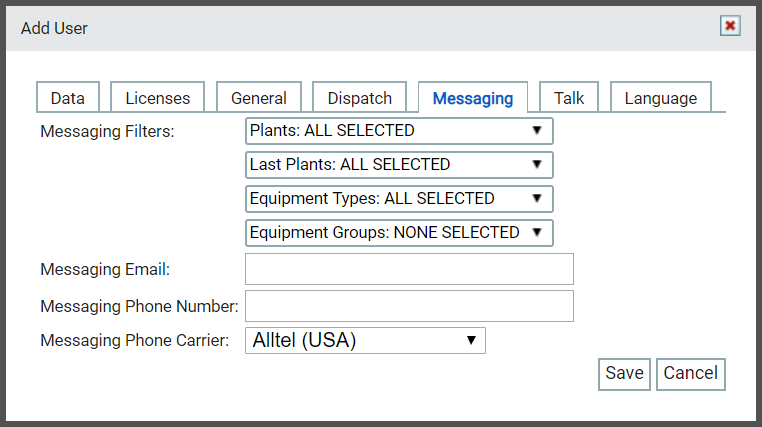
As part of TrackIt's effort to encourage effective communication, this tab of the Add User dialog window allows you to define what messagesText messages exchanged between drivers and dispatchers using TrackIt. the user will see and how.
|
Messaging Filters |
If your user is a dispatcher, use these filters to restrict messages to only the plant and trucksAll machines used as a means of production on a construction site or at a batch plant. they oversee. Otherwise, the user will see all messages sent by all drivers for the company. Filters may be set by Plants, Last Plants, Equipment Types, Equipment Groups. |
|---|---|
|
Messaging Email |
For record keeping purposes, some users opt in to receive messages as emails. Enter a valid email address here for the user to allow them to receive an email copy of each messageText messages exchanged between drivers and dispatchers using TrackIt. sent to them via TrackIt. If no Messaging Email or Messaging Phone Number is specified, then messages will only display from the dispatch screens of the TrackIt Web Console.
|
|
Messaging Phone Number |
Users away from their computer may want to receive text messages with each message received in TrackIt. Enter a valid phone number here to allow the user to receive text messages from TrackIt. This must be 10 digits long (phone number and area code) without any spaces or symbols between numbers. This value is used with the Messaging Phone Carrier to create a carrier email address for the user to receive text messages. If no Messaging Phone Number or Messaging Email is specified, then messages will only display from the dispatch screens of the TrackIt Web Console.
|
|
Messaging Phone Carrier |
To send messages as text messages to phones, TrackIt must know which carrier is in use by the user. Based on the selected carrier, TrackIt arranges the Messaging Phone Number into a format required for the user to receive a message. |
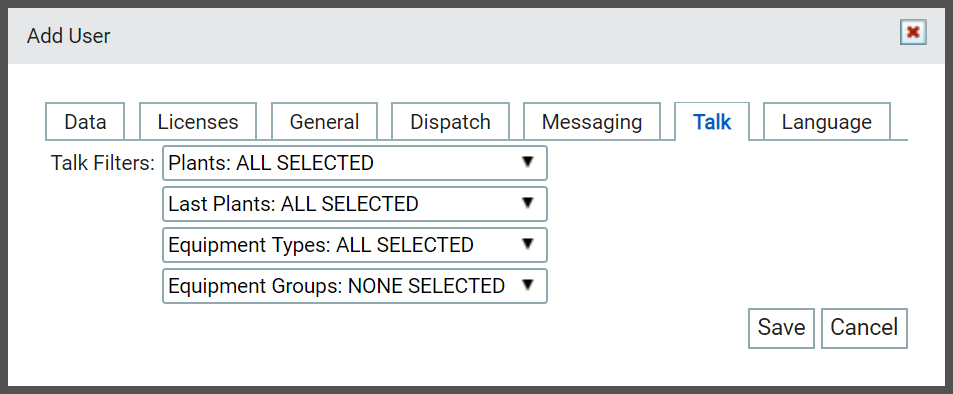
Companies with Zello Talk licenses will find this tab available in the Add User dialog window. This allows you to set filters for what Talk groups the user can interact with via audio messages.
|
Talk Filters |
|
|---|
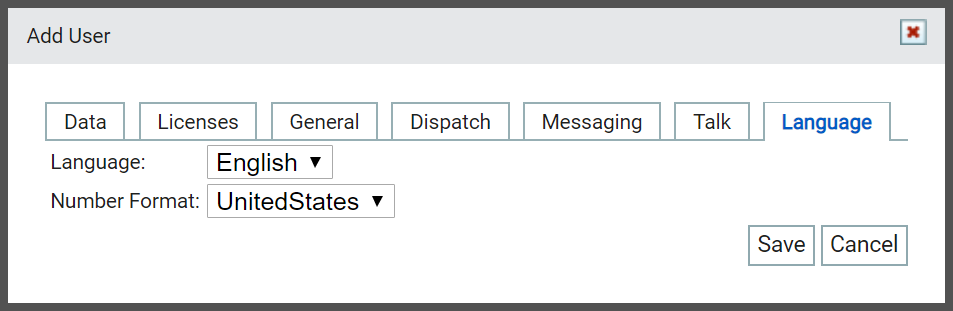
From this tab, you can set the language used throughout the user's TrackIt Web Console. The settings here only impact their account's instance of TrackIt. Company-wide language options are controlled from the Languages tab of Site Settings.
|
Language |
You can change the language for the user's individual TrackIt display. Language options available to users are controlled from the Languages screen. |
|---|---|
|
Number Format |
To accommodate the differences in how decimals are represented throughout TrackIt, select UnitedStates or Europe. The United States uses the period for decimals, such as Europe uses the comma for decimals, such as |
- Navigate to Settings > Driver Performance > Site User.
- Click the Add User
 button.
 - From the Add User dialog window, enter in the email address for the user in the Username field.
- Enter in the user's first and last name in the relevant fields.
- From the Permission drop-down menu, assign the user a Permission Type.
- Select the relevant information from the drop-down menus in each tab.
- Click the Save
 button to finish adding the user.


- Navigate to Settings > Driver Performance > Site User.
- Find the user who needs a reset password.
- Click the Editbutton to the right of the user's information.
- In the Data tab, click the Reset Password
 button underneath Payroll Plant. A notificationA software-generated message or warning triggered by vehicle data. will appear confirming that an email has been sent with instructions for resetting the user's password.
 - Click Okay in the notification at the top of the screen.